DIY Stained Brown Paper Floor Awesomeness!~ Under $30 Do It Yourself Hardwood/Laminate Floor Alternative
My new favorite thing ev’ah.
What an odyssey this was for me! Starting with the ugly grey vinyl and transforming the floor into a BEAUTIFUL glossy masterpiece! There were a lot of sites that inspired this floor, and I would like to mention some of them.
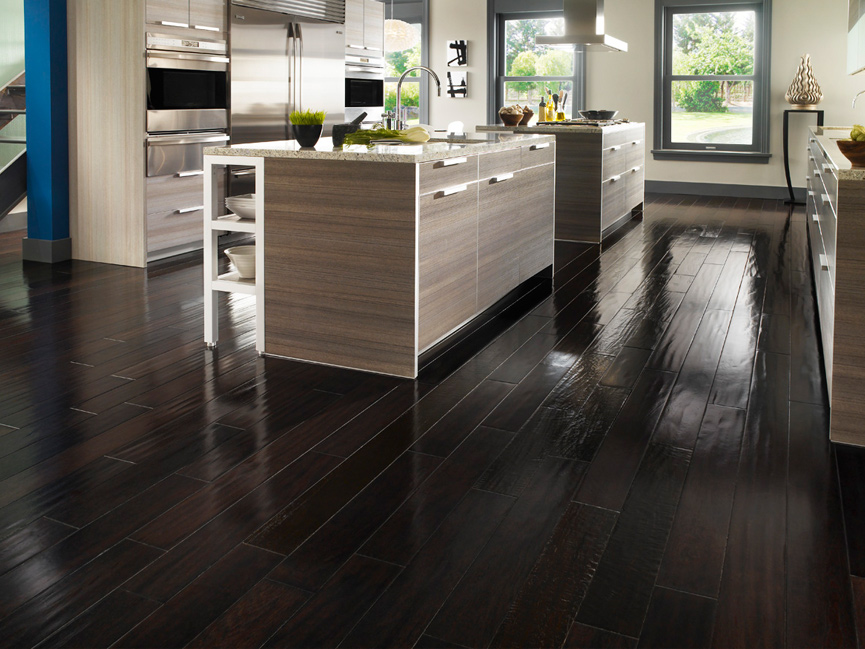
Here is where it all started: An Oregon Cottage blog, which has a video tutorial to start those creative juices flowing. Of course, with two pugs, a cat and 7 year old boy in the house, I wanted to see how the durability of this floor treatment stood up. I found that answer here: Yankee Magazine, where in the comments, the project owner comments on how the floors held up in Alaska melted snow and ice. Finally, I had issue with the contractor paper color. I really wanted a dark floor, so finding this site was a total game changer for me: Lovely Crafty Home. Finally, I had issue with the “satin” or matte finish of all the paper flooring sites I saw. After a bit of research, I felt confident in my choice to do a HIGH gloss “piano-finish” after looking photos like this dark espresso hardwood floor. I would constantly be trying to make my floor super shiny with Mop-n-Glo, so why not just make is permanently shiny to begin with!?
So let’s begin….
(please forgive faded blurry video stills below)SUPPLIES USED: Some from Lowe’s, some from Home Depot…
- Roll of contractor’s paper from Home Depot ($10)
- Gallon of Elmer’s Glue ($13)
- Plastic Dish Tub (FREE had on hand
- Water
- Minwax Jacobean Oil Based Stain 1qt. ($8)
- Sheepswool Stain Applicator ($8)
- Soft rag
- Varathane High Gloss Floor Polyurethane ($49)
- synthetic 4″ paintbrush ($5) taped to a broom handle
- silicone caulk (FREE had on hand)
- blue painters tape (FREE had on hand)

This is what we started with. Ick.
Before we started, we made a decision to try removing the vinyl without taking off the baseboard trim even though we were going to paint it all white later. Luckily, the vinyl came up easy breezy!
We used the air vent as the starting point since I wanted to save the transition piece between the vinyl and carpet under the door. 
The whole process to remove the vinyl took maybe 10 minutes total.

There were some splotches of leftover adhesive we just scraped it off.
")
Be sure to sand down any leftover adhesive that you can’t pry up to avoid bumps under the paper and give the floor a good vacuuming. We didn’t tape off the baseboard trim because we were going to paint it white afterwards anyhoo, but we DID bluetape off the toilet base.
")
(Note: photo shows paper grey, but is actually a light brown)
Prepare your paper! Tear pieces into whatever size you like (I used mostly cantaloupe sized ones with smaller accents) putting the straight edged ones in one pile and the middle sections in another. That way you can save the straight edged ones for using against the wall. Crumple each really well, and then open and lie them flat in a pile. The more you crumple them, the more color texture the floor will have.
")
I laid out the edge papers so I could make sure I had enough to do the job…..I didn’t want to have to stop and tear more paper pieces in the middle of the project. I put all the “straight edged” pieces in one pile, and the “torn all around” pieces in another pile. The “straight edged” pieces were saved to use against the straight edges of the wall around the perimeter of the room.
")
Put about 2″ of water in the bottom of a plastic dish tub, then add enough glue to make a nice mixture that has some pull to it when you stir it. I ended up using about half the bottle of glue with that much water. During the process, I used anywhere between a 50% mix of glue/water all the way up to a 30%glue/70% water mix and they both worked equally well.
")
Take your rings off and get ready for the fun part! Dunk your first piece of paper in the glue mixture and get it all wet.
")
When you pick it up, use your fingers “scissor style” to help pull the glue off the paper so it isn’t so drippy.
")
GLUE FINGER PAINTING! Some people in their blogs had recommended using a paintbrush to apply the glue to the floor prior to laying the glue soaked paper, then using a brush to spread the glue, but I did it differently. No “pre-glue” application on the floor and I’m all for using your fingers to put the paper on for a few reasons:
- 1. It feels awesome.
- 2. You can really feel if there are any wrinkles or bumps under the paper that need dealing with.
- 3. Later, once you’re done and it dries, it’s fun to peel off your skin!
Next, smooth down the paper with your fingers, paying special attention to the edges. I recommend wiping from the center out so you keep the edges nice and flat.
")
CORNERS: Some folks have recommended cutting corners of the paper with scissors, but I like the more texturized version I used. This is what I did… Lay your first piece down and smooth, then take your second piece and overlap it with the straight edge meeting in the corner. Easy breezy and no scissors needed. Continue with the pieces, overlapping each just a bit to ensure full coverage. Don’t forget to attend to the area behind the door before you run out of room to do so!
")
This is what the floor will look like after you’re just finished. Creepy looking with giant white wrinkles and gooey and bumpy patches and you will think you might have messed up somehow, but don’t worry! Don’t freak out about the wrinkles! All is well! It’s supposed to look this way at this point, and it will look awesome later….you’ll see.

SEE?!! Here is the floor after 24 hours. It looks SO COOL! Kind of like ostrich leather mixed with cork mixed with stone.

Here is another closeup. (sorry so yellow, it’s my camera.) I was tempted to just leave it this color and apply the polyurethane and call it good, but the buff camel color of the contractor’s paper was just not going to work with my décor vision.
")
NOW FOR STAIN:
THIS is the original culprit. Not knowing what kind of stain was used in Rachel’s blog, I assumed it would be the water based variety (why? I have no idea). This did NOT end well, as you will see.

I was trying for a super dark espresso color, so I originally went with a custom tint, trying to get Bombay Mahogany, but it came out milk chocolate (baby poop). Ick. THEN I figured I’d have them make it darker at Lowe’s and although the next version was a better color, it did not go on smoothly at all. It was all gloopy and streaky and marked up, just HORRIBLE! Ugh, this was turning into a nightmare! Not knowing what to do, I thought perhaps it was just the color, and that maybe a DARKER color would look better.
")
I re-papered over the mess. Same technique as before, tear, wrinkle, dip, flatten and 10 minutes later, voila! It was just like hitting the reset button! Hooray!
")
WHAT TO DO?! I decided to contact Rachel from the Lovely Crafty Home blog and discovered that she used a lambs wool applicator and OIL based stain. OhhhhH! This time it will look PERFECT! Or so I thought….
")
And this time, let’s try EBONY. THAT should be dark enough, right?
")
Aaacckkk!! Noooo! You can’t really see from this photo, but it looked like someone took a bunch of soot and smeared it on the floor. It was GREY! Ick! This paper staining was an entirely different animal than wood staining! Looks like I needed a warmer toned stain to achieve the effect I was looking for. :::sigh:::: Time to repaper …….again.
")
That was easy! Turn Mr. Fan on and we’ll be ready to re-stain in no time.
…..fast forward two weeks later……
")
FRESH NEW STAIN: Ooooooh! JACOBEAN! THIS is the color! Let’s try this!
(Note: I bought mineral spirits to clean all the Ebony color off of the lambswool applicator, and not having worked with mineral spirits before, I figured it would only take a bit of the $6 bottle to clean it. OHhhh I was so wrong! It took the entire bottle and the applicator was STILL not clean! I could have just bought a new one for the same price had I known. Oh well, live and learn!)
")
So, the first coat of stain went on easy breezy, but then I was a little skimpy in my application and realized that the center area needed more to blend the color better, so I waited two hours and tried to “even it out” in the middle by daubing on additional color. WRONG IDEA. (Sorry for washed out video snapshot.)
")
I even left KNEE prints from trying to fix things. ::::sigh:::back to the internet for more research on what to do!!
I slept on it and decided upon waking that I just needed to repaper just once more.
This time though, I decided to get on my hands and knees and run my hand across the paper to feel for any lifted bumps or issues after so many re-papering attempts. There were a few gappy bumps that I had to glue down. If there is a dried bump, you can sand gently to remove the knob before staining. Then I just applied the first coat of stain correctly this time.
It looked GREAT! I really loaded up the stain on the pad and let a really thick coat sit on the paper for a good 3 minutes before gently blotting/wiping off with a soft old towel rag. To avoid smeary marks, I just daubed it over those areas.
Let it dry overnight. I found that the oil based stain never dries fully and will feel tacky to the touch. The poly application is a little tricky, but be sure to put on a pair of dark socks and then you should be able to walk on it gently with socks now for the poly topcoat application. CAUTION! DON’T TRY walking with barefeet! You’ll end up pulling up the stain and have to repaper the whole thing again!

NEXT: The high gloss poly coat!
APPLICATION TIP: Take your 4″ synthetic paintbrush and duct tape it to the end of a broom handle.

This is the topcoat I used. About $50 from Home Depot. Make sure you get a FLOOR FINISH poly so it is durable enough. Now comes the choices: satin, semi-gloss or high gloss? Every paper flooring project that I could find online had used satin or semi-gloss finish for their poly topcoat. I wanted to do the super glossy “piano finish” because I just adore that shine! The good news is that if I ever get bored with the high gloss, I can just apply a coat of satin or semi-gloss over the top for a new finish!
FYI: During research the pros recommend NOT trying to put high gloss on top of satin or semi-gloss because it will create a cloudy effect.

OH MY GOSH, applying the polyurethane topcoat is so easy! Cut into the edges well to seal the whole thing down. If you’re not going to paint your trim like we are, be sure to keep your blue tape on!

Apply with back and forth strokes. Don’t worry, the brush marks won’t show, they melt into a shiny hard finish. Put on thin coats and they only take about 10 minutes to dry before you can add another. I did 7 coats in the bathroom.

Time to remove the blue tape! You need to cut through the poly coat to release the tape. When you cut, make sure your blade is parallel with the floor so you are more cutting under the toilet edge. If you try to remove the tape without cutting through the poly topcoat, you’ll peel up the entire finish!

As you can see, I could have used a wider tape here, but cleanup was easy breezy with a disinfectant wipe.
Next: sealing and making that edge look nice and clean. Some pros caution about sealing around a toilet base because if the toilet wax seal underneath ever fails, it could cause a bunch of floor damage before being detected.
Pshaw! My reasons for sealing:
- 1. It looks better and will cover the raggedy edge from cutting.
- 2. I have a bunch of boys under the age of 9 that pee there regularly and do not like the smell of urine that pools at the bottom of the toilet when they miss their target.
- 3. I’ve never had a wax seal fail on my in my 43 years and our house is only 7 years old.

So, if you are going to seal things, you have some choices such as those shown above. I’m all about silicone for it’s 100% waterproof quality, BUT we didn’t have white silicone, so I applied the paintable latex white caulk first to make it look pretty, then put the silicone over the top once it was dry.

Nice and tidy white line makes Mommy happy.

FINISHED!
SOOOoooo shiny! Well, I still have the trim to do, but LOOK AT THAT! Nevermind the stain that seeped into the carpet, ’cause that baby is gettin’ all tore out and we’re putting this floor throughout the house!!!


Add a little white painting of the trim and this will be perfection!

Voila! We added shoe molding to our trim and it gave it a sharp and finished look. Fantastic!
More pictures of the texture:


BEFORE
AFTER!
Total cost of this floor treatment: $27.00!!
(Calculated $ based on % of product used. Barely made a dent in the roll or paper, gallon of Varathane and stain.)
UPDATE: August 2011: We’ve lived on this over a week with dogs, cat, little boys, guests, water, spills, etc. and it’s looking still perfect! No marks or scratches whatsoever! We’re so impressed that we’re planning on tearing out our entire house of carpet and vinyl and putting this instead! The only difference will be our son’s room, as he is going with a PiratesofTheCaribbeanKrakenFish theme and the contractor’s paper original color looks like sand, PLUS it will be easier to do any repairs if needed due to no stain matching required.
UPDATE: October 2011 : Been a good couple months, with TWO toilet overflows that sat for a good half hour each before Mommy was told about them. NOT ONE PROBLEM! Still looks good as new. Waterproof deluxe!
UPDATE: MARCH 2021!! TEN YEARS LATER! You guys, we DID end up doing our entire house with this paper floor treatment. Over 2000sqft!!! We ended up having most of the house like this for about 4 years with GREAT wear. We figured we would have it for a year, tops, but it just ended up working out fine and next thing you know, 5 years passed! We have since just put in wide plank wood laminates over the top of every single room we did this in, except our powder room. The original room that we first tried this in. IT STILL HAS IT IN IT!! I’m going to post a video update on YouTube about it, so find me there at http://youtube.com/mossisawesome.
More updates on how this is holding up: PAPER FLOORING UPDATE AND REPAIRS
I am going to start this probable tonight on my dining room table top. My concern is that the table is just a cheap one and the top in covered in that gross fake laminate that looks like wood but underneath its mdf of some sort. Can I paper over it without having to take all of the laminate off? Id rather not put a ton of work into since we will be getting a new table when we move in a year or two.
I haven’t tried it over laminate tops, but you know what I would do first?….. I would pry off that top laminate piece and just apply it to the MDF. My only reason is that with a table, there are edges that could wear down and become “pickable” for anyone that likes to pick at stuff, then once the seal was broken, it would probably peel off like nail polish does on your nail, y’know? With a floor, it’s a flat sealed surface, but the edges of the table would be tricky. Taking off the laminate would give it a better surface to grip to I would think. The table edge is still an issue, but perhaps if you really sealed it well with polyurethane multiple coats it would be okay. Plus you’re only needing it for a year or two, so my guess is that it would be okay.
Has anyone tried doing this under the toilet? I’m planning on doing this but will be changing my toilet in the future, I’m not sure if the base will be the same and don’t want to either NOT change the toilet or have to find one with the same base.
Yes, if I did this in another bathroom, I would remove the toilet and paper the floor, stain it, and seal it before replacing the toilet.
Holy cow, I love this….I tissue papered my dining room walls and it was not easy…..I think this is my floor fix!! Your tutorial was great….I will let you know how this turns out!
Just a little update..I was so excited to do this and I went to pull of the laminate but the mdf underneath was ridiculously bumpy AND had holes and gaps everywhere! I was mortified so i put the small piece that i had pulled up back down and decided to try and paper over it just to see if it would dry right. I did this last night. This morning The corners and edges stayed beautifully but the center bubbled. I tried to poke em but it just wouldnt work. I took an exacto knife and cut up the pieces that needed repapering and off I went to start over.. only this time I was out of glue and used modpodge (its the same medium basicially) now I am currently waiting for it to dry. Hopefully when I get home from work all will be right in the world lol.
O and I have a question.. I bought Dark Walnut Oil Based Stain. The paper when it dries Still feels ummm “papery” for lack of a better term… Will the stain still take to it? When I’ve stained wood you rub it or paint it on but with this i feel like if i try to rub it on it could be blotchy or maybe tear?? will this happen or am I just being a weenie?
Don’t worry about the bubbles….it will go down on it’s own once it’s totally dry. For the stain, I found the best technique was to use a lambswool applicator (you can get it at Home Depot or Lowe’s), and just soak it on heavy, let it sit for a few minutes, then daub it up with a towel. Dab, dab, dab, until all that is left behind is the color and not pools of the stuff. The paper is stronger than you think, but I still didn’t do much “wiping” because it left it streaky. I left mine rather thick in places, and no worries, it all dries excellently. Since you’re using this as a table, I might suggest BEFORE you stain, and once the paper/glue has sat for a good day or so, to lightly sand down any bumpies that are left from the wrinkled paper. Just the big ones….I wouldn’t worry about the little ones. Then add your stain after you sand. Once you put the polyurethane over, it will smooth out the little bumps, but the bigger ridges might be an issue if you sit a glass on it, it might not sit flat, and nobody likes wobbly cups! 🙂
All the bumps are taken care of but I am tempted to just leave the paper the color it is rather than stain it the dark walnut… what do you think?
Sure! If you like the color, go for it! I’m going to use the unstained version in my son’s room ’cause I think it will go better with his pirate/sand/ship thing going on in there. One less step to do for you. 🙂
UGH I am so sorry to keep bothering you. We went without the stain and put one coat of poly so far. But you can tell where I re-papered and where I didnt. If I use stain over the poly to camouflage the area where I didnt will it work? I googled and yahooed till my head hurt so I would have to bother you again but I can’t find info anywhere
Good question…. I’m thinking there won’t be as much “absorbtion”, but it will sit on the surface, so you’d have to do a lot of “blotting” and less “wiping” on application. Hmmm…..You might want to make a small “dummy surface” on something else….do the paper/glue, let it dry, add the one coat of poly and let it dry….then try the stain out and see how it looks before you try it on the table. I’m curious how you can tell where you re-papered and where you didn’t? When I repapered my floor, I couldn’t tell where I redid it…is it darker? Or more raised? Or??
I did the stain to try to hide where it showed the most and for the most part you can’t tell unless you already know its there.. and you have ocd like myself. You could see the difference because where I hadn’t repapered it was lighter and the edges of the paper had a dark tinge to em.. Whereas the repapered area was all darker and the edges weren’t any darker than the rest. If that makes any sense lol… soo now I have to wait until tomorrow to re-poly..
I noticed you said you were going to be doing the rest of your house like this. Have you tried in on stairs? I am trying to find something different to do with my stairs because with kids the carpet is horrible.
Haven’t done it yet, but totally planning on it! I’ll update my blog as soon as I do. 🙂
I was just wondering do you think you could do this over cement floors like in a basement???
Good question Rebecca. I haven’t done this personally, but have read in other blogs that people have had both success and failure at this. My guess is that it would need to be sealed with some kind of waterproof sealer so there was absolutely no chance of moisture coming up from below to cause lifting of the floor treatment.
This is beautiful! I live in a older home with vinyl that won’t come up without destroying the subfloor. Do you think it would work on top of vinyl?
Hi Kathy! Thanks for the compliment! I’m not sure how it would do over vinyl. I guess if it was solidly sealed down to the floor without any buckling, curling or gaps like between tiles (not sure if full sheet vinyl or sticky squares that you have). If it was nice and solid, and didn’t have any tears or uneven issues, I’d think it would totally be doable. I guess the worst case scenario is that if it didn’t work out, you’d just either apply new vinyl, laminate or other flooring right on top of the paper floor. That’s the beauty of this floor treatment. You won’t have to tear it up or try to remove it to add any new flooring on top of it.
I think if you sand lightly over the vinyl you will be o kay to glue the paper down.
My only concern would be any patter from the vinyl showing through or the seams showing. But sanding might work? Try a test board and see how it goes first.
I love your floor. Gonna try this and pray I don’t mess up.
Best of luck! Just go slow and do your research first. I’m sure it will go great! I just finished my living room and am putting the last few Varathane coats on. I hope to update with that version soon.
This is exactly what I’ve been looking for!!! I was going to try and learn to tile our bathroom floor, but the thought of all that measuring and cutting scares me a bit. Not to mention the cost! I was also wondering how paper would do in the bathroom and then I found your site. I, too, have boys who frequently have problems with “aim”. It’s good to know that’s not an issue. I can’t wait to do this!!! Thanks for the excellent tutorial!
Thanks Samantha!
Thank you Samantha!
This looks great! ideas are endless! I may try this on a cement bathroom floor! Can I use scrap book paper you think? I want to match our local sports team themed fun room!
You can use any kind of paper you like! I almost used the pages from an old 1974 World’s Fair book that I had, but since we’re selling the house in the next couple years, I didn’t think it would fly too well with other folks. 🙂
Hi, I have a question. Do you think you could use a paint instead of a stain. I am looking for more of a cream/ white. Thanks!
Huh, I dunno about the paint, good question! I’d try it out on a practice board first to make sure it works. OR, I’d just use cream/white paper! Just get a bunch of butcher paper and use that. That way you won’t need to bother with stain or paint. 🙂
Your bathroom floor looks great. I might suggest spray painting your heating vent cover to blend/match your floor instead of white…?
I like the white, but thanks!
Thanks so much for posting this great idea! I’m really excited to try it out for …well, for pretty much my whole house. I’m wondering what kind of subfloor you have in your bathroom (or in the rest of your house). We have cement board under our carpet. Do you think this technique will work on it? Thanks much! Can’t wait to see how the rest of the house turned out!
I had wood subfloor. Not sure how it’d work on cement board. I’m assuming it would work great! Thanks! I’ll be posting updates with more rooms soon.
So in the end did u use a oil based stain?
Yes, yes I did! Then a water based poly topcoat.
thanks! Im gonna attempt the smallest bedroom floor! If all goes well Im gonna do a ceiling. Im thinking with newspaper.
How slippery is it? More or less than the vinyl? They look great!!!
Thanks Susan!
Not anymore slippery than a laminate floor, but probably a bit more slippery than the normal “dimpled” grippier vinyl.
Just did this floor in my daughters room, now my other daughter wants this as well
That’s fantastic! Did you find it easy or did you have any difficulty? I’d love to see a photo of it!
I need an affordable DIY solution for my kitchen countertop, this seems too good to be true. Do you think it will hold up to the water that can be forgotten on a kitchen counter? Your note about the two overflows makes me think it will! Any advice would be great!
My guess is that it will! It all depends on your topcoat. I’d use a high quality auto topcoat similar to what I talk about in my blog about the faux granite countertop that I painted. Best of luck!
I’ve seen it done on another blog. And I think they used wallpaper, marble looking, and put poly over to seal.
I love this concept! I actually came here to ask a question, but I found my answer in the replies that have already been left! I’m thinking about using a high grade scrapbooking paper. I’m excited to use this idea in the fixer-uper we just bought! Thanks for the wonderful idea that looks SO amazing!!
Thanks so much! Your idea with the scrapbooking paper sounds great, but wondering how expensive that would be? I have also wondered what a floor done with white paper would look like. I might try a sample board of that to consider for my master bathroom floor. Best of luck on your project, I’m sure it will turn out awesome!
If you did your stairs how slippery would the poly make it and would it be a hazard? I have some horrible basement stairs that need a redo and seriously thinking of this but want to make sure we stay safe. Love your tutorial…great results!!
I haven’t done the stairs yet, and this issue has come up for me as well in thinking about it. I think I’d use a semigloss for the stairs rather than the high piano finish gloss that I’m using for the rest of the floors. I’m also thinking I’ll need to get a set of carpet treads or something along that line to prevent slipping. We have an old doggie and young kids with slippery socks, so this is something we need to make sure isn’t an issue as well. I wonder what it would be like to add a sprinkling of sand to the top coat of poly to give it a grip? Maybe I should try that on a practice board first to make sure it doesn’t look gross. 🙂
Ooh! I’d be very interested to hear what you have to say about the sand! I’d love to do my stairs and think this technique would work great, but am similarly concerned about slippage. I was thinking about gluing a strip of gripper, like they have on some industrial-type stairs, but think that might a little, well, industrial.
I am thinking about trying all of this in my upstairs bathroom this summer…Will be coming back here to check on more updates as the time approaches!
Thanks for sharing all your work!
Haven’t got around to doing the stairs yet. As soon as I knew, I’ll be sure to update might you know how everything went.
How about using a fine grid of sand paper instead of sprinkling sand which would be messy and time consuming!
I have a question I was thinking of doing this in my main bath with a tub. I noticed your bath only had a sink and toilet. Will the floor hold up in high traffic area?
So far, so good. We have done it in every room on our main floor except the kitchen….which is next! We have a family room, living room, hallway and powder room with this paper floor treatment. Yes, they do get a gouge or scratch at times, but SO easy to fill in with a Sharpie, then I filled an old nail polish bottle with polyurethane for touchups. Easy breezy. Next, we’re tearing out the upstairs carpet too!
I have done bathroom counter tops like this and they lasted for years. Just did a desk top for a friend and a dresser. Never had any problems. I always used a dark walnut stain. I also use paper sacks from the grocery store so the paper never cost anything.
We done our church fellowship hall with the brown paper bags. Feed stores will have bags, don’t use the paper with print or pictures, because when you do the poly they will show up even if you turn that side down. We did add some paint to glue mixture to get a variety of colored stones and a lady from the church did calligraphy. She put scripture on some pieces and even had a guy who painted flowers on pieces and we used them. It really looked good. Also got creative with gold paint.
WOW~ That would be interesting to see! Any pics online?
Do you have pics of countertops?
Haven’t done the kitchen yet, but when I do, I’ll put ’em on here~
I love your floor! I’m trying to do it in my bathroom, but I’ve already messed up the staining… Re-paper! Did you put a coat of poly on the paper first, before the stain? Or just after the glue dried? Thanks for your help, I hope you still check this thread.
Thanks! No…be sure to stain first, then poly. Glue, stain, poly, poly, poly, poly, poly, poly, poly, and poly. And if you’re up to it poly, poly and poly once more. 🙂
Hi love your bathroom, but my oil base stain will not dry it’s been two days do I have to tear paper up to repaper
Hi, oh wow, sorry for the late reply on this. I would have said….no worries…the oil base stain never dried totally on mine either. I just put a pair of black socks on and quickly applied a thing coat, let it dry, then applied the rest of the topcoats afterwards. It worked great. How did yours turn out?
To future folks: No. You must poly after staining. Note: stain will never dry completely and will feel a little sticky/damp. You will apply poly, then it will feel completely dry. I painted fleur de lis on my floor before staining with black acrylic paint…Looks awesome! (Kitchen and entry foyer) had lasted in these high traffic areas going on two years.
If this is done on a basement floor on top of cement, will it help the coldness not be so cold? Will it be about the same as if I used the peel and stick tiles? The same amount of cold coming through?
Hmmm…that’s a good question. I have mine on top of subfloor…just plain chipboard subflooring. It does block any air from passing through the cracks, but not sure about how insulating it woudl be over cement. My guess the floor would still be cooler than if you used a different flooring. I would guess similar to peel and stick…maybe a bit cooler though.
I would suggest that a heavier paper, such as cardboard be used in this technique to cover floors to prevent coldness.
I would think that cardboard would tear and snag, and warp once wet with the stain and poly. I personally wouldn’t recommend that. Is that what you have done in one of your rooms?
do you have pictures of the other rooms? I’d like to see this done with paler colors.
All the rooms that I’ve done are with the darker Jacobean color. I didn’t do any lighter……yet. I think I may do the master bathroom in white.
Hello I love this floor and plan on doing it soon to our house. Question I plan on doing my living room. My only concern is that all of our bedroom doors lead into to the living room. Can I do it in sections at a time so we aren’t living in the kitchen for a week..
Thanks for the help
Yes, you can do it in sections, but be sure to get down your staining technique before then. As long as you use the exact same application technique, you should do fine. I made a point to have a varied transition instead of a straight line between the living and dining room, and although they are slightly different depths of color, it works. This process made a very varied design/tone/color in each room, with darker areas and lighter areas all melding together for a neat look. I did, however lay a straight paper edge between the powder room and hallway because as my first room, I did a different application technique in the powder room which made for a more muted and uniform color saturation, so rather than redo that whole room to match the rest of the house, I just made a straight edge transition with blue tape when it came time for the stain and poly coat. Worked great and looks great too!
I loovveee this and want to do this in my hall bath. Only issue. It is tiled. I got a great deal on an older large home. They did some updates but left the back in the day pink bathroom with peach tub and toilet. Lol. My concern is if I tear up the tile I will find a mess. And not be able to do it. And not have floor at all. Was this subfloor you did it on or what?? What are your thoughts on this?? And also in our in our laundry room we have laminate. We think there is concrete under there bc the turned that garage area into part of the house ie master bedroom and bath, etc. Could we do this on concrete???
Hmm…tile. I did mine on the straight subfloor, and in a perfect world, I would have laid down plywood first, as trying to fill the gaps in the subfloor ended up making for some lessons learned. Every single imperfection DOES show on the finished paper floor, so be sure to take that in to account! I think concrete should be no problem, but if it were me, I’d paint the concrete with a good sealing primer first to seal it. Last thing you want is any moisture coming through the concrete to the paper floor. As for the tile, you’ll end up with a tile pattern that will come through the paper, so if you don’t want that, you’ll either have to remove the tile or find something to level the surface…and that is the question..what to do that with? Not having done it before, if it were me, and I wasn’t going to remove the tile, I might try self leveling concrete first. BUT if I did that, I might must do a cool staining technique of the concrete and seal it and call it all good. You can also do it over laminate. You don’t have to remove it as long as it is adhered fully to the floor, but be careful, if it has any pressed design in it, that will show through the paper floor.
for better color options and richer color, maybe use a wiping stain (zar, old masters are good options) minwax is a penetrating stain hence why the color isnt as rich as you expect it to be and can use more coats. also the quality of stain ..minwax is the bottom of the list…also for those of you who have mentioned doing counters or tabletops, i can highly recommend a two part resin coating that has a high gloss finish ..its by envirotex i believe and is a pourable finish. This will hold up to wear and tear better then a poly of some kind. I hope these are some helpful tips!
Would love to see the finished project, Georgina.
Awsome job! LOVING IT ! I am going to try adhering brown paper to my white shiny tile backsplash that is BORING. I am thinking a copper paint finish … they sell new shiny metallic liquid paints now at Lowes. Then applying the coats of poly over…… will try a small section first to see how it works out. You are a great inspiration ! Thanks for these tutorials. Georgina
That was extremely entertaining reading. By your fourth re-paper I was LOL hahahah IT IS GORGEOUS and I have seen many butcher paper floors:) Congrats on a job well-done!! Very inspiring:)
Thanks so much! Only have the kitchen and laundry rooms left to do on the downstairs, but am heading upstairs and redoing the hallways and bedrooms soon.
I was wondering how you clean this surface? What products do you use? I have a steam mop, would that mess up the poly coat? Thanks!
I tried a steam mop and it made my poly cloudy. I gave my steam mop away. LOL! Now I just use a damp Swiffer and it works great.
Love the rustic look of your floors. I think I’ll try it in a room that has cement floors but first I want to experiment on some scrap plywood. Why is it necessary to spread glue on the top side of the paper as well as the bottom?
Thanks Steve! It just assures that everything is securely adhered to the floor and no curling of the edges occurs. I’d recommend sealing the cement floor before doing this to avoid any moisture wicking.
Great job and wow are you patient!! I have yet to see anyone post anything about animal claws and how it holds up to it. I ask this because when I refinished my pine floors, I used the floor Varathane product but my 5 cats have scratches all over the place and I used several coats. I am concerned that if I do this it will just be all scratched up as well.. Just wondering what it would look like with cat scratches.. Anyone??? 🙂
Yes, cat scratches will happen if you have kitties that tend to want to scratch the floor. We have two cats, one older and one kitten, and they aren’t prone to scratching the floor, so it hasn’t been an issue for us. Our old pug though, has longer nails and if we don’t stay on top of them, they can scratch the finish down to the paper. We just fill the scratches with a black Sharpie (since we stained it such a dark Jacobean color) and cover that with poly and it’s good as new. If I had a lot of scratchy issues, I might have opted to not stain the paper and let it stay “natural” brown paper color. That way scratches could go much longer without having to be dealt with. You could just put a coat of poly over the floor for maintenance a couple times a year.
Hi there, LOVE your floor! I’m going to do a small space in my bathroom. I also wanted to know if you have done anything over TILE. I have large kitchen tile on the floor and its white. It shows everything! I would love to do this to it if it will work. ANYONE try TILE???
Embossed tile might have a design show through the finished job…also seams might show. I’d either remove it, sand it smooth, or fill gaps as needed. The smoother the surface, the better your result.
Im curious about how water and scratch resistant this is. My father is in flooring and Ive never ever heard of this. Will the paper start to warp if water sits on it for too long??
I’ve had multiple toilet overflows (thanks to my young son) on this and it has held up perfectly. No warping or anything. But then again, water was only sitting on it for maybe 10 minutes or so. I guess there are some little boy pee pee accidents that end up sitting for much longer around the toilet bowl, and those don’t cause a problem either.
Gosh, this looks very do-able! But how do you clean this? I have a steam mop and and am thinking about starting in my dining room, but am wondering how I would clean this surface. ewww and especially in a bathroom…with boys! Does vacuumming scuff it and will chemicals eat away at the poly or will steam mopping melt it, make it gooey? Brilliant idea about the poly in the nail polish bottle, btw.
I tried the steam mop in our living room and it made the poly cloudy, so I gave a way my steam mop! I vacuum it with my Roomba and use a Swiffer style mop and it works fine. The bathroom, I clean around the toilet with Clorox wipes and it works great. Everything hunky dory.
I’m planning to do my bathroom floor, but it’s my only bathroom in the house! How long will I have to stay off of the floor?
You can do it in steps. The paper part dries fast. You only have to stay off for like a couple hours. Once you get to the stain, you’ll have to stay off for a good 12 hours (in a warm house with extra fans and circulation pointing to the floors) and even then, you don’t want to spend a lot of time on the floors until you poly it. If you can poly right away after the 12 hours and let that dry another 30 minutes, you’re good to go until you add the additional poly layers. Those all dry quickly, 30 minutes, tops, for each to dry.
We just bought a house with bright white ceramic tile in the entry way, dining room, and kitchen.
Do you know if I could lay the paper floor directly over the ceramic, or if I have to try to rip it up first?
I’m afraid the seams would all look wonky once done. Unless you can fill the seams and make it entirely flat and smooth, I’d think you’d have to remove it first.
OmG, I am so trying this in my bathroom. Do you think with the the pressed design on the laminate would look awful or just add a demension to the floor. Also will any color from the laminate show through. I am single mom, so money is tight, so want to do it right the first time. Yours looks beautiful!!!!
What I’d do is get a sample tile of a laminate with an embossed design and try a sample board of it and see how it goes. If it looks great, then you can go ahead, and if not, then you’re only out that one little sample tile. Good luck and thanks!
Has anyone used a stain/poly combo? I have a gallon of walnut stain with poly built in. Wondered if I could use it
I haven’t, but I’ve heard of people using it. Let me know how it works for you!
awesome floor! this inspire me too much to change look of room in a little cost
Thanks! Hope it goes well for you too!
Hey, has anyone ever done this on a wall? And has anyone ever tried adding grout lines to make it really look rock/stone? That’s what we’re planning to do, with large more square ‘stones’ for the floor and smaller, rounder ‘rocks’ for the wall in a lighter Arkansas color and will be testing stain mixes on white paper.
I’ve heard it looks great on a wall! I’ve also heard about people doing this with strips of paper so it looks like boards and also using patterned paper to look like stones as well. Sounds like a fun plan! I’d love to see the results!
I commend you for your determination to get this job done. Thank goodness this was a small room! How long did this take start to finish with all of the repapering??
Oh, the re-papering really only took about 10-15 minutes. So not a big time issue for me, but after all my mistakes, I really have the technique down now though. A newbie might take twice as long I would guess.
OMG!! I would’ve been in tears with all of the re-papering that you went through :’-O Thank you for all of your trail and error for everyone 😀 I gotta try this in my pantry which is plain grey concrete (ugh) now, this would look stunning.
Let me know how it goes!!!
I just caught this thread on Pinterest and had never tried using the brown paper on floors before or used stain on the paper – it looks great! For walls, I have dry brushed gold and copper glazes as well as black paint over the wrinkles. Use a light touch so you don’t get huge blotches on the paper. After that, tear the paper, divide into straight edge pile and all torn edge pile and continue on… I bet this would be fabulous on a floor!
Sounds pretty!
Oh my goodness…your trials and errors must have been SO frustrating! However, thanks so much for letting us learn from your mistakes! Your floor is AMAZING!!! So I have a question for you! I was thinking this could be perfect for our kitchen floor; however, we have a kitchen island that can move (it’s a heavy cabinet/countertop), and my kids slide our kitchen chairs back and forth from the table to the counter. Anyway, my question is…do you think the flooring would really hold up to that without scratching or tearing it up? Thank you!
I haven’t done my kitchen yet. I was planning on doing it, as I have now done my: living room, dining room, family room, powder room and hallway. Our dining room is fine with chairs going in and out because I have extra cushy felt tips on the feet of each chair and table. This is a MUST! The table can get scratched or torn if you use a sharp thing and drag it. Just as a laminate floor will scratch. BUT this is a bit more likely to tear more easily than laminate. I just prevent that issue by felt-tipping all the chairs. Keeping Fido’s nails clipped are a must too. Our pug’s nails were running long and she scratched up the floor in our family room a bit. EASY to fix with the dark color Jacobean, as I found that a black Sharpie disguises all scratches, and all I need to do is add a touch of poly to the top to seal here one night after the family is asleep.
Also, how do you clean it? If I did it in the kitchen, I’d be cleaning every day as my kids are always spilling or dumping something! Thanks!
Cleaning is easy with any typical non-abrasive cleaner. I wouldn’t use a steamer on it though. I clean mine daily with a Roomba vacuum and when needed with a damp Swiffer style mop.
Thanks! And what brand is Jacobean? Where did you get that? Any ideas for my kitchen island? I can’t really put the felt underneath it since it’s once big block…
At first, I was thinking….Mmmmm what is this lady doing. Now I want to try this!!! Its beautiful!!!!
Hi, I was just wondering how your original flooring project is holding up and how you did on putting the rest of the flooring down.
Can you do this on OSB board?
Absolutely!
Oooh, I think this would be neat using colored comics from the newspaper!
I applied the oil based stain 3 days ago and after looking at it, I would love to do some touchup staining to even some areas out before putting poly on it… would that mess things up? Im just thinking… once I put poly on it, I probably just have to live with it, right?
Since I originally did my floors downstairs, I’ve had to touch them up a few times. Most recently, just before Christmas, I did a major touch-up using water-based stain in a similar shade that I applied to the scratches with a Q-tip, and then did the entire top coat of poly over everything again. It really freshen it up and was super shiny and looked fantastic. It was easy to do too. The beauty of the stain technique is that you don’t need to have an exact match. In fact, having a slightly different what patching up all the scratches gives the floor even more character. Once you go over the whole thing again with poly everything melts together and it looks great.
I really like how your bathroom floor turned out with the dark stain :~}
I have a trailor ( not sure of the date ) but it’s not to old … Buying it … I need to redo the kitchen floor — It has lost it’s shine !!!! Also my cabinets could use a make over !!!! Do you have any ideas that will help / also cheap !!!! Thank you :~}
Thanks for that great story! Now I know what to do and what not to do. This is really helpful. 🙂
Okay most will think I’m nuts but I have old hard wood floors under the carpet in my house and I wondering if I could cover part of them with this technique. Two of the rooms are in really good shape and can be salvaged. My living room and dining room are terrible. Do you thing it would be possible if I sand and cover the seams I would be able create this flooring in this area? I really love this look and the carpet needs to go. The only way I see fixing the hardwood in the living room is to replace it. Any thoughts?
Oh man, if I had hardwood floors, I couldn’t imagine doing this over them without at least trying to salvage them first!
A few years ago I did this process on my hallway walls and used shoe stain instead of wood stain and it came out perfect the first time making my walls look like old leather. I still love it and often get compliments. I didnt want an all over one color look, I wanted more of a variegated look and thats what I got. Thanks for the detailed tutorial. Its fabulous that you gave us you missteps as well as you success. Your floor looks great
I glued my paper down & it is completely dry. I used green paper so not staining. It didn’t dry flat. lots and lots of bubbles, is this ok? do I just poly over the bubbles or should I start over and try to get more air out?
Im not worried about the look, the bubbles are cool, Im just wondering if the air under the poly will make a difference or if it will flatten out under the poly
If the paper is completely dry with bubbles, they need to be cut into and glued down with Elmer’s before poly. They won’t go down with poly on their own.
I’m considering doing this in my kitchen and dining room where I simply have a concrete slab. It’s cold. Do you think I could mount underlay, for laminate flooring, to the concrete and then do this paper floor over that to provide a little bit of warmth?
I would not recommend putting a foam underlayment under this. I would fear that it would pucker and pierce once something heavy or pointy was on it like a skinny chair leg.
Did you have a gap between the floor and trim? If so how did you fix that? Thanks!
Yes, I did have a gap. I ended up just adding a shoe molding to fill the gap. Looks great!
Do you see any reason you couldn’t use this same technique to reface kitchen cabinets? I am pretty sure being in a 1972 mobile home, the cabinets are just plywood.
Sure!
I would love to see a photo of lighter floors. Any out there? White? Cream? Gray?
wonder what would happen if you sprayed the paper first with a little bleach water randomly and let it dry? Then pasted it down? Think I have to experiment to see what it does to paperbag and red rosin paper. Wonder what would happen with spraying acrylic paints on it and then polycoating? The possibilities are endless!
Thanks for posting the pictures and process of your bathroom! It turned out wonderful! I am thinking about doing this in my cabin bathroom but was concerned about the moisture. After reading your blog it sounds like it works great in a bathroom s I am going to go ahead with it. I did this floor treatment in a little 10 x 14 cabin on our property and it turned out fantastic. We used a roll of mailing paper from the post office, a roll of recycled paper from the paint department at Walmart (this had little specs of different color within the brown paper), and a few pieces of mauve butcher paper for here and there placement. We didnt know to crinkle the paper so we didn’t do it we just tore it into different size pieces leaving the strait edges for along the walls. Instead of glue we used wallpaper paste on just one side of the paper and then smothed out any bubbles with a pizza roller. I think I will do the glue for the bathroom I am going to do though. We also didn’t stain because we had three different shades of paper. As for the poly, we applied it with a paint roller and it worked out great. Anyways, thanks for the insight, I really appreciate it!
Hi! I’m in the process of doing the paper bag floors to my hall and another area that runs into my hall. I have a quick question. I was planning on using the Famowood Glaze Coating (Liquid Glass) in place of the poly because you do not have to use but one coat of this stuff vs. several coats of the poly. After realizing that a gallon of the Famowood only covers 36 square feet and I actually have around 160 square feet to cover, I was wondering how many gallons of the poly did you have to use on your floor? I’m trying to go the cheaper route but still want my floors super glossy. =)
Oh man, it’s been so long, let me think. I did about 1000sqft with up to 15 coats in each room…thin coats, mind you. Um, I’d say that I went through half a gallon per room. Not sure if that helps?
I actually did this and I love the final results. I however had several challenges, which required me to repaper 3 different times. It was definitely a learning experience and I sure wish I had known some of the things before I started. 🙂 I actually wrote a blog about my experience in case anyone else is thinking about doing this. I learned a few good lessons. http://apurposefulpath.blogspot.com/2014/03/my-first-paper-bag-floor-test-and-learn.html If anyone can learn from my mistakes, that’s a good thing. 🙂
This is absolutely ~Beautiful~ I’m wanting to do this in my bathroom, and hallway! Yours looks Fantastic… Thank so much for sharing this…
I was wondering if you could do this technique on my cement wall in my basement?
I don’t see why not!
So, I finally did my first paper bag floor. I had to redo the paper 3 times because of stupid mistakes, but man does it look beautiful! I cannot get over how much I love my floor. If anyone is interested in learning from the mistakes I made before taking on your own floor, you can read about my adventure here. http://apurposefulpath.blogspot.com/2014/03/my-first-paper-bag-floor-test-and-learn.html I would love to hear from you! – Have fun and thank you so much for this awesome past. Mally
I recently finished my paper bag floor and had a similar experience. I had to re-do the paper 3 different times due to stupid mistakes. But oh how I LOVE the final results! It was such a good learning experience, I thought I’d share my information with others. You can read about my adventures here.
http://apurposefulpath.blogspot.com/2014/03/my-first-paper-bag-floor-test-and-learn.html
I hope you enjoy! Malinda
when u re-papered all those times did you do it over each layer? if u did, do u think that thickening would be good for strength…durability? i mean, seems like a few layers of paper might be the way to go. the finished floors look fantastic…i was wanting to do a wall in the office with old maps, same technique?
Yes, just did it over each layer. I do think that the multi-layered areas seemed to be a wee bit more durable than the others.
THANK YOU for letting people know up front all the goofs and how you fixed them. I am going to try this and would have went the same route you did. Your floor looks amazing and it is awesome to know it is holding up.
I read all your comments and noticed some duplicates but very informative. You mentioned sealing the creases between wood sub floor and having it peep through the paper treatment, do you think a darker sealer would bleed through or work better? I have an older home that has the older laminate counter tops, should I sand it before apply the paper treatment? Ty
I don’t think the color of wood filler/sealer would make a difference if you are using the brown contractor’s paper. If you were to go with white paper or something like that, it might show through. I don’t think you would need to sand any laminate before putting this on. Do know that there will be tiny ridges where the paper overlaps, so the countertop will not be totally smooth and level. Good luck!
Pingback: Six Weeks Later… | Happy Homemaker – Redux
In place of the glue can i use elmers woodglue an it still turn out
I am not sure. I used regular Elmer’s glue, but I don’t see why wood glue wouldn’t work. I’d test it out on a wood test plank first though.
I stained mine after the glue dryed and I have dark spots from the stain. Do you know what I did wrong? Can I just re-paper just the spotts and retain them? Thanks
Dark spots are part of the character. I have those on some of my room floors too. If they REALLY bother you, I would suggest repapering and being more light-handed with the stain. The dark spots tend to come from the stain pooling. I say embrace the dark spots! They just add character!!
I have a small entry way and do not plan to rip up the laminate floor. Do you know if this would work if I sand the floor? Also I do not plan for such a dark floor, could you recomend a medium color. Thank you. Brenda Akl
I have heard people have excellent results putting this right over laminate as long as the laminate is securely glued to the floor with no curling edges, etc. No need for sanding either. The plain paper without staining is an excellent medium color, and would make for WAY less work! Skip the staining and just put the poly on!
Pingback: Brown Paper Floor – Part 1 | Blue Mountain Holly
WOW – 5 stars in my book! (‘sup with the creeps who rated it less – mean and jealous or just picky beyond reason?)
LOVED all the “anecdotal” (don’t do this – try this: here’s why). Also thought the updates were great. You are MY kind of blogger. Wonderful job! THANKS!!
Since I rent and cannot do this directly on an extremely disappointing (ok, UGLY!) kitchen floor in my otherwise hardwood-floors new apt., I plan to try it on a “floor cloth” made with the cheapest linoleum remnant I can find (instead of canvass). It’s on my list – but I’m not even totally unpacked and organized, so it will probably be a year before it happens. I’ve pinned it to DIY & Dumpster Do-overs so I can find it when I want it.
Your report of your oopses on the way to the finished project has sparked a number of ideas – so I *really* appreciated those. My narrow galley kitchen is black and white, so I’m thinking a finish that looks like red leather would be fun to try. If I don’t like it, I’ll repaper and try again.
I once rented from a flooring contractor turned renovator, btw – the product you used to top it off is ALL he recommends, and what he uses in each of his rentals. As you pointed out, you can top it off without prep if the finish starts looking tired. He did that every time one renter moved out as a matter of maintenance (and once while I lived there).
IMHO, unless people are PAYING for your content, your photo production values are certainly “good enough” (several articles on my blog re: virtues of same). I’d rather see you spend your time documenting other cool projects vs. fussing with a camera to get perfect pictures! My advice: don’t worry about it, and don’t apologize for it. Your explanations of what things really look like are more than fine — you are a doll to use the minutes of your life to help us save a few in the lives of the rest of us. God Bless!
xx,
mgh
(Madelyn Griffith-Haynie – ADDandSoMuchMore dot com)
– ADD Coach Training Field founder; ADD Coaching co-founder –
“It takes a village to transform a world!”
Are the floors slick after applying the polyurethane?
Not “slip and fall down” slick, but similar to a laminate wood or vinyl floor.
You guys done an excellent job, love the floor…..Now, time for me to do my own. Im so scared!!!!!
can you use just regular brown paper bags to get the same result instead of buying contractor paper. I mean is there a difference?
Yes, use brown paper bags. They work just as well. I actually supplemented a couple rooms with those when I ran out of the brown contractor’s paper. 🙂 Just make sure you put the printed side down.
Hello …..first let me say thank you so much for your tutorials on the floor I’ve been researching and reading about the paper bag floors for over 5 months. I recently did my sons room and I decided to do a plank style finish. The floor I was laying on top of was a hard wood floor….. the gluing process went fine…. although it took me 5 hours…. How ever when I applied my stain Main wax Gunstock…. I got several very large noticeable oil botches. The weird thing. …is they did not appear at first…. it was only after a hour of me applying the finish. I did a sample board prior to doing the floor……..no problem. Do you have any suggestion on how to fix the blotches without ripping up the entire floor? ????? ?? I was thinking about just taking up the pieces that are heavily blocthed……….I don’t know. Any suggestions would be helpful. Thank you in advance for your time and consideration.
Shay☺
After I did other rooms, I noticed the blotches on the paper after it sat for a while too. I believe that occurred because I was much more liberal with my stain application in that room. I ended up embracing the splotches, and it seemed to gather around the toward edges of the paper, giving more of a giraffe style appearance to the floor. Like the pattern on a giraffe. Once the entire floor was done it looked really cool. If you’re doing slats and wanted it to look more like a wood floor, I’m not sure if the blotches situation would look okay. My suggestion would be to wait for it to dry, and then redo the glue and paper over the problem areas. Then restain. Be very careful not to have the new stained areas overlap with the old stained areas or you’ll end up with darker areas. It’s very tricky to do, but it’s possible. The worst case scenario, is repapering the entire floor, and starting over from scratch. It may have been a heavy hand when applying the stain, or perhaps in that area of the paper didn’t have quite as much glue in the glue water mixture and the stain seeped through the paper and pooled a bit there. It can be frustrating, I know. If you read back up in my article, you’ll see that I had to repaper the entire floor a couple times. It was easier, of course, because it was a smaller room. It’s frustrating that your sample board ahead of time did not show this issue for you. It’s probably a combination of the flooring that you’re doing it on, your water to glue ratio, and how heavy you’re applying the stain. This room that I have in this article, has much less stain on it then my other rooms do. Since this was a smaller room, I was on my hands and knees applying the stain carefully, and doing a lot of daubbing style application. My other larger rooms that I did were with a much heavier hand, and I ended up liking that much better. I hope you’re able to figure it out. Sorry if I don’t have any better advice for you. Let us know how it turns out!
My husband just suggested that if you desire a very even stain color, you seal the paper floor with an oil based sealer before applying the stain. You could even use water based sealer, but he thinks the oil based would be more durable. Any generic sealer will do. Just be forewarned that sealers are very fumey/smelly while applying/drying. This is such a great floor, by the way. Thanks for the idea!
Dont not do it it doesn’t last I have had it on my floors for about 2 years it doesn’t hold up to kids the poly starts to break down and the pieces of poly gets all over your house
Oh, I’m sorry you haven’t had a good experience with the floors. Problem is that it sometimes comes down to environmental factors when putting the floors in combined with how long layers are allowed to cure and which products are used. I’ve heard varying degrees of success with this technique. I can only comment on my own personal experience. Now that I’ve done a total of 5 rooms in my downstairs, I have discovered that each has experienced a wee bit different wear resistance. I ended up using two different poly coatings, and found that a slightly different technique for each also had an effect. The one room that I did redo was the living room, as the technique I used for it was rushed, in colder weather, and with a less durable poly than the rest of the other rooms. After that, they all held up really well for the 3 years that I had them. My intention was never to use them as a permanent floor covering solution, but merely as a temporary situation until I could afford to wood laminate floors to replace them. I just installed 2100sqft of laminate this spring, right over the paper floors, and the only room that I left the paper floors in was the powder room, which is the first room that I ever did with the paper floor technique. It is still in PERFECT condition. Not a crack, wrinkle, hole. Nothing. The only thing I had to be careful with in the other rooms was dragging furniture or anything sharp and heavy. Pets, little kids, and Pacific Northwest weather didn’t phase the floors for the 3+ years I had them. Just an occasional touchup with a Sharpie, and it was all good. Sounds like your poly adhesion didn’t cure well for some reason. We had a problem of that in one corner of the front living room, but I just repapered over that part, restained and used the better poly, and it was all good after that. Again, sorry to hear yours didn’t turn out as well.
I glued the paper down and it’s dry, byt, there are so many wrinkles and bumps, my husband doesn’t think it’s gonna be okay. Should I re-do it?
It depends, all of the rooms that I did went super wrinkly and bumpy as it dried, but once 100% dry, it all was flat and fully glued down. If there are edges that lift when your hand runs over it, just glue them down. If you have bumps that feel like there is a bubble or lifted air space underneath, you need to tear that bubble out and just put another soaked paper piece over the top. There will be wrinkles, bit they shouldn’t be raised wrinkles, meaning you shouldn’t feel big ridges when running your hand over the top. If you do, then you might have had too much water and not enough glue in your mixture, or you didn’t soak both sides of the paper well enough. You might want to peel off a 2’x2′ area and redo it with more glue in the mixture and saturate the paper on both sides. See if that works before you redo the whole thing. If your small redo area doesn’t work out, then it could be some other factor that I haven’t experienced. Temperature? Humidity? Good luck!! Let me know how it goes!